
In this blog post I will show you how to use real 3D perspective in a typical 2D card game. We will not look into the actual game logic, but only focus on the graphics side. Ranging from obtaining and preparing the assets up until using a perspective camera and positioning and rotating playing cards in 3D space. This is a relatively low entry tutorial, but some experience with libGDX is recommended.
The full source, assets and a runnable test of this tutorial can be found on this github repository.
The assets
Obtaining the assets
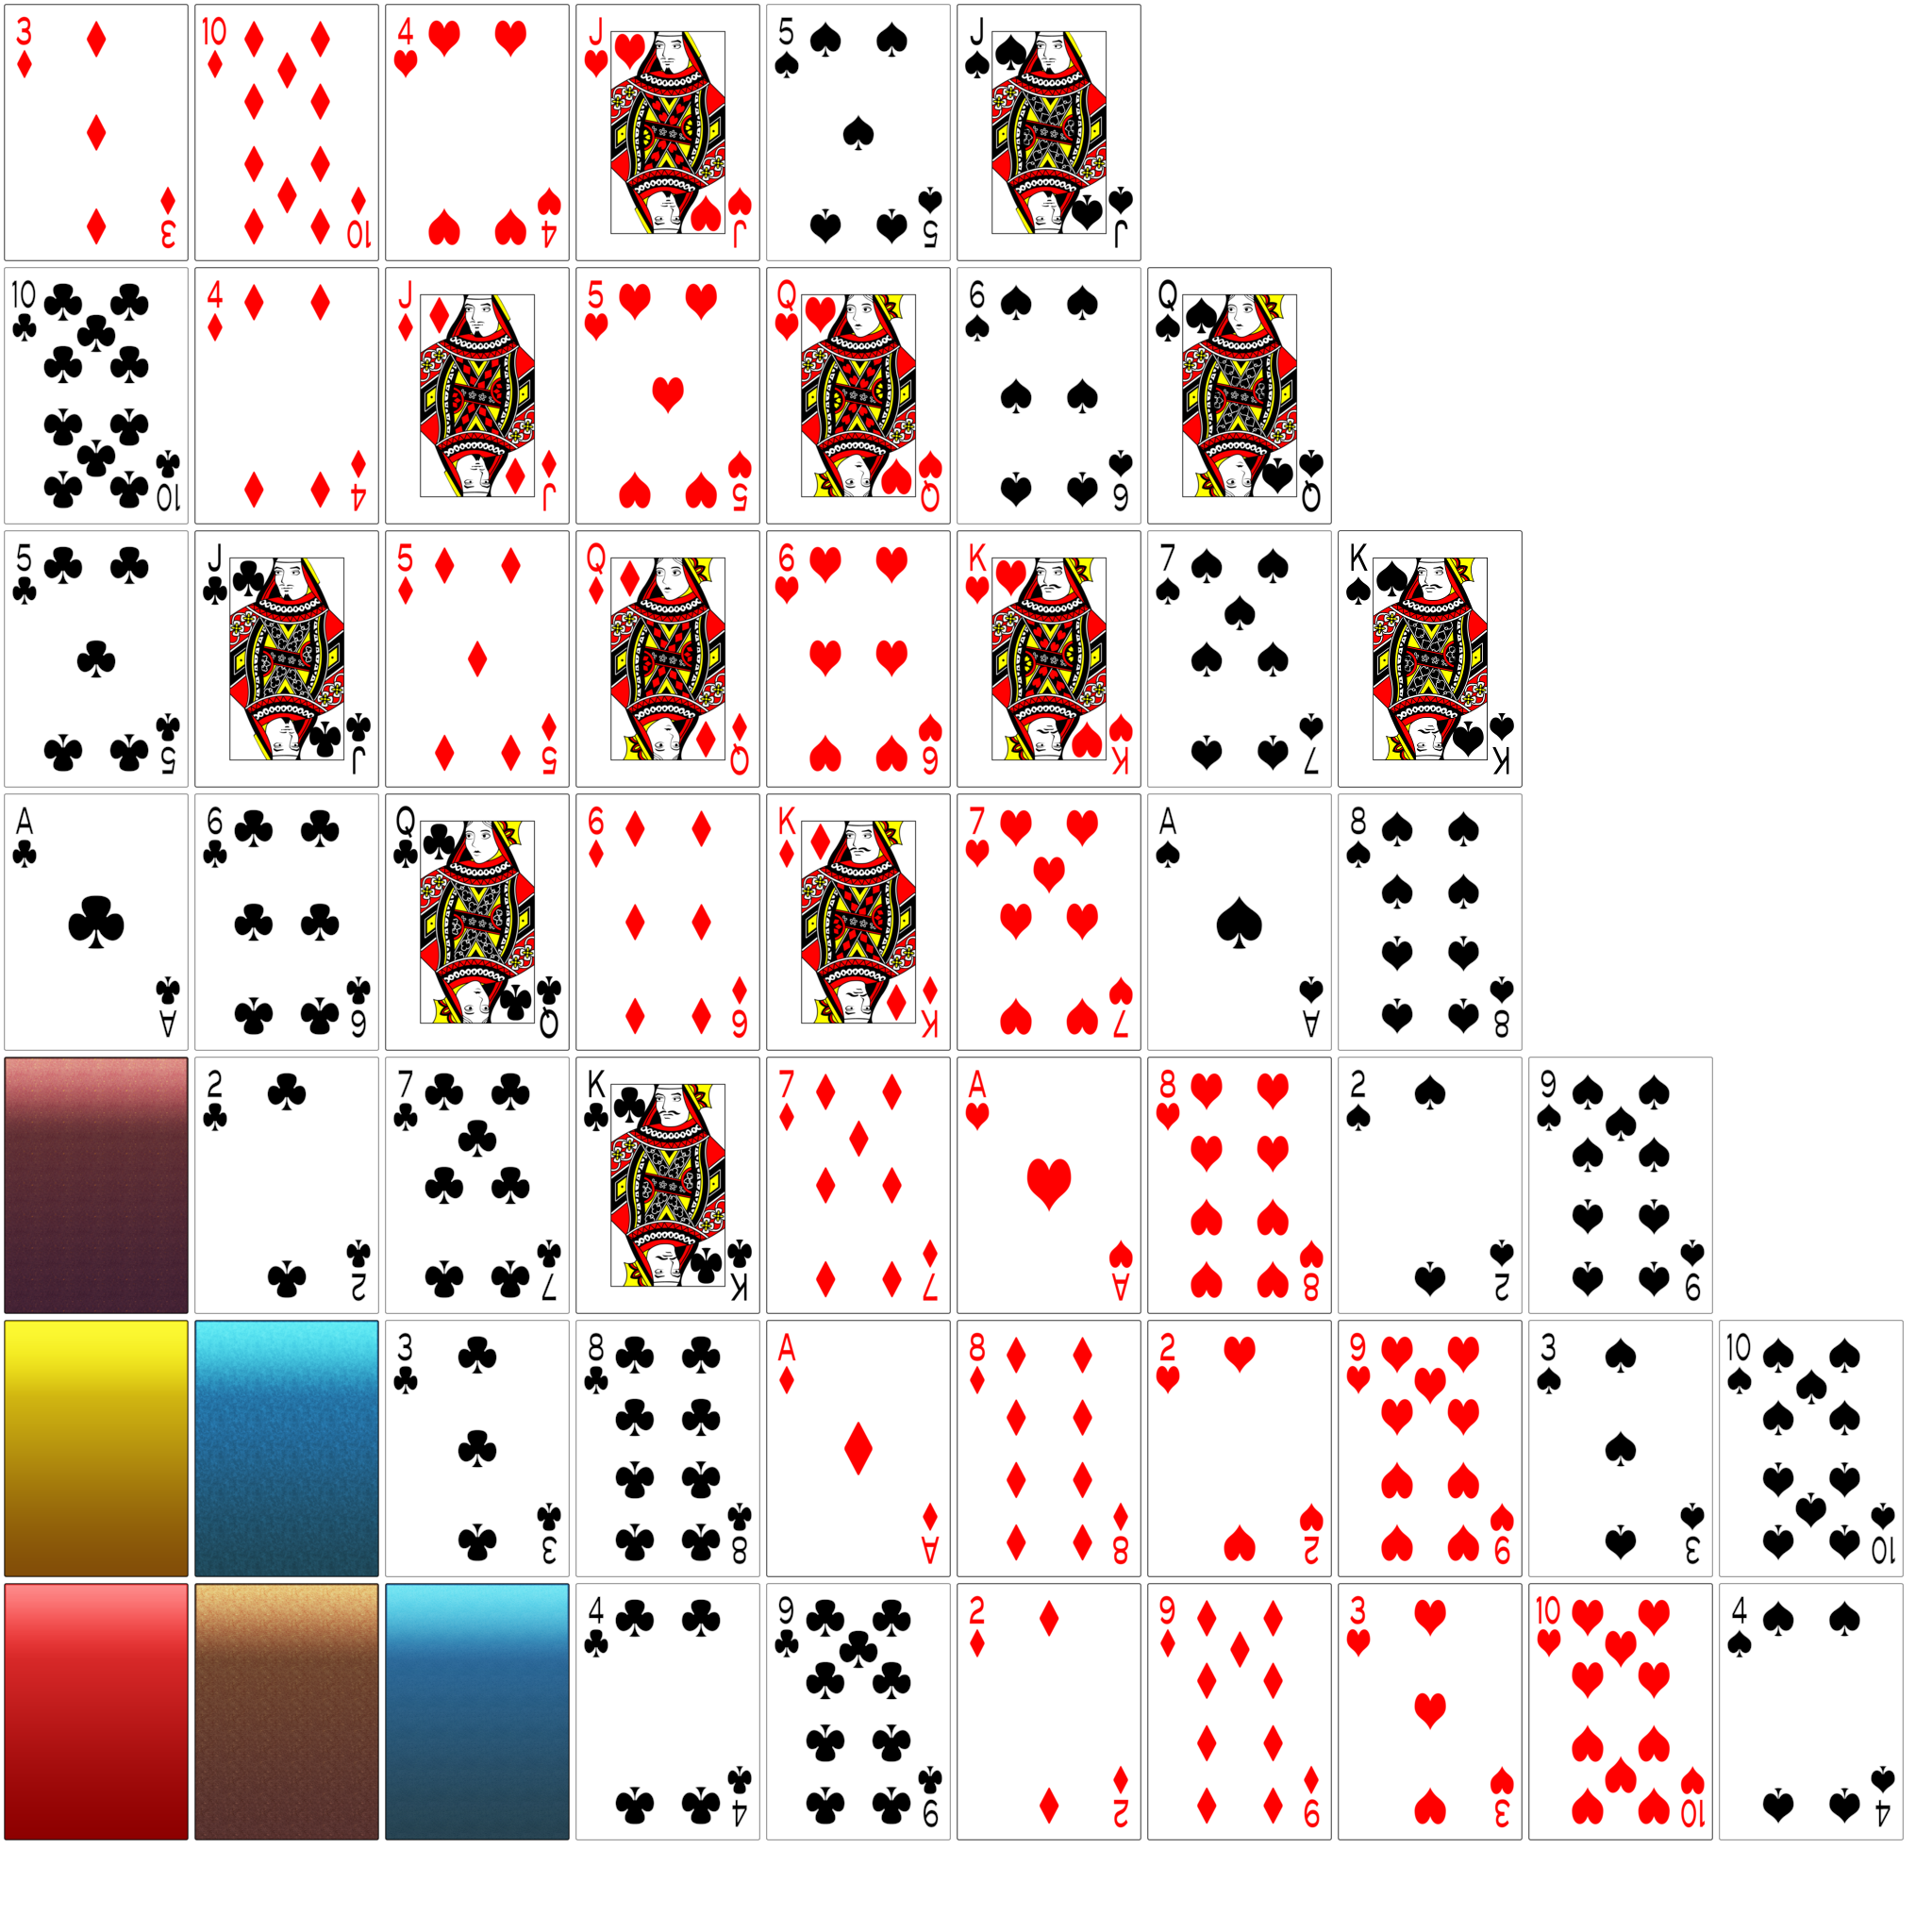
In this tutorial we’ll be focusing on getting things done. I’m not very good in graphics, so we’ll resort to the great OpenGameArt.org website. Where you can find, usually, free to use assets. Make sure to check the license though. After a quick search I found these playing cards. Basically a huge set of images of your standard card deck.
Always make sure to keep the source files of your assets. Preferable this is the .blend, .psd,
.svg file and the like. This allows you to easily generate other assets for other resolutions etc.
In this case we have to work with quite large .png files of 768 by 1063 pixels each.
Make sure your assets are correctly sized
For our use case these images are way too big, they are practically the same size as entire screen. Always make sure that your assets or not too big or too small. You want to avoid scaling assets at runtime as much as possible. Let’s say that a typical screen is 1280 or 1920 pixels wide and we want to show quite a few playing cards next to each. So a size of 200 pixels wide for a card should be good. Keeping aspect ratio, that gives us 200 * 1063 / 768 = ~277 pixels in height. I’ll not go through the process of the actual resizing, for which I’ve used ImageMagick’s convert utility.
Btw, for my convenience, in this tutorial I’ll be showing screenshots or videos taken at a resolution of 640x480. So, unless you see the cards taking up a third of the screenshot, you might notice that they are (quite heavily) downscaled.
Naming your assets
Next we need to make sure the assets are correctly named. We have to work with quite some images, so
we need a clever way to access those. For this we can use indexers. Basically this means that we give
them a meaningfull name and append them with and underscore and number. For example: clubs_01.png,
clubs_02.png, clubs_03.png etc. This way we can later get all “clubs” images sorted on index. The
order I used is 1:ace, 2:two, 3:three, 4:four, 5:five, 6:six, 7:seven, 8:eight, 9:nine, 10:ten,
11:jack, 12:queen, 13:king. So, e.g. spades_12.png is the queen of spades. The image set also contains
some back side images, which I named back_1.png, back_2.png, etc.
Indexers are very useful in a lot of cases. Not the least for spritesheet animations. If you ever find yourself manually splitting up a texture in equally sized regions, then consider using indexers instead. It offers more flexibility and allows optimations like packing multiple animations, as we’ll see next.
Packing images
We now have 58 200x277 sized images. Unfortunately this is not very practical to work with for a game.
Constantly switching between images adds quite some overhead. We need to reduce that to a minimum.
Luckily there’s
texture packer,
that allows us to pack multiple images into one or more bigger images. In fact, all of those 58 images
fit in one 2048x2048 sized image, with some room left for some other images as needed. I’ll not go
through the process of packing them, but you should end up with two files, an .atlas and .png file.
I named them carddeck.atlas and carddeck.png. Note that you cant simply rename the files, because
the .atlas file contains the name of the .png file.
Texture packer allows for some options. You’ll need to adjust at least the maxWidth and maxHeight
parameters to 2048. Besides that I also set the filterMin and filterMag parameters to Linear.
This will give a somewhat blurry result, but prevents details (like the thin line on the cards) from
disappearing because of scaled texture sampling.
Optimize images
If you look at the individual images then you’ll see that each card has a transparent border. Texture packer can optionally strip this away to save on image size, while keeping track of the original image size. I this case, we wont do that because the linear filtering doesn’t work on the edges of the image. Therefor, to prevent aliasing it can be useful to have a small transparent border around your images. Be aware though that even fully transparent pixels do also have a color value (usually black or white), which will influence the texture sampling. This is most commonly visible as a dark or bright border around the images. To solve this you can change the color value of the transparent pixels to that of the surrounding pixels.
Whenever you see an thick dark border around the cards in the screenshots or videos of this tutorial, now you know why that is. Most popular image editing applications have an option to fix this, but I’m not very experienced with that, so I’ll leave that up to the reader. Feel free to point me to a good resource on how to do this though so I can link to it here.
Initial setup
With the assets ready, we can load and display them. If you haven’t done so, setup your development environment and create a new project. Make sure that your newly setup project runs, by testing it on all devices you plan to run it on, without any modification whatsoever. Also make sure that you are on the latest libgdx version. This tutorial is updated if needed when a new version is released and might not work with earlier version.
Next place the assets we’ve created in the assets folder of your project. This is where the default
badlogic.jpg file also resides, which you can safely remove because we wont be using it. Make sure
to copy both the .atlas and the .png file.
Time for some coding. We’ll start by loading the atlas file and displaying a card or two, nothing fancy.
For this we need to modify the ApplicationAdapter. I’ve named mine CardGame, but you can name it how
you specified it when creating the project. Here’s the full class, we’ll discuss it below:
public class CardGame extends ApplicationAdapter {
SpriteBatch spriteBatch;
TextureAtlas atlas;
Sprite front;
Sprite back;
@Override
public void create() {
spriteBatch = new SpriteBatch();
atlas = new TextureAtlas("/carddeck.atlas");
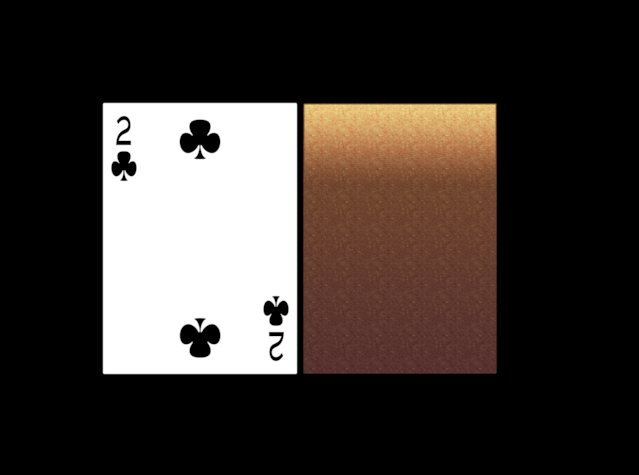
front = atlas.createSprite("clubs", 2);
front.setPosition(100, 100);
back = atlas.createSprite("back", 3);
back.setPosition(300, 100);
}
@Override
public void render() {
Gdx.gl.glClear(GL20.GL_COLOR_BUFFER_BIT | GL20.GL_DEPTH_BUFFER_BIT);
spriteBatch.begin();
front.draw(spriteBatch);
back.draw(spriteBatch);
spriteBatch.end();
}
@Override
public void dispose() {
spriteBatch.dispose();
atlas.dispose();
}
}
Here we create a SpriteBatch, which is the class responsible for rendering our cards. If you’ve
followed the “A simple
game” tutorial, then this would look familiar, otherwise I’d suggest to follow that tutorial first.
Next we load the .atlas file that contains our images. And we ask the TextureAtlas to create a
front and back sprite. I a bigger game you’d use an AssetManager and show a loading screen while
the assets are being loaded. But for the sake of the tutorial, I’m not showing that code.
In the render method we clear the screen and then instruct the SpriteBatch to render our two sprites.
The SpriteBatch and TextureAtlas needs to be disposed because they use native resources. So we do
that in our dispose() method.
If any of this is new to you then this is a good moment to first follow a tutorial on starting with libGDX. For example the “A simple game” tutorial and here is a list of other tutorials.
World units
This code relies on the size of the assets and the actual size of the screen, it is a so called pixel perfect projection. For our game this is something we want to avoid. We want to be able to play the game on devices with different screen resolutions without affecting game play. Likewise, we want to be able to use different assets, for example SD or HD, without affecting game play. As we’ve seen in the previous post, this can be easily accomplished by using a camera.
First we need to define our units. Since this is a card game, let’s use “cards” as our units. This way
we can easily place cards next to each other in a grid for example. The cards are not square, let’s
take the width of a card as one unit. And then make the card height/width in height. Since the
cards are 277 texels in height and 200 texels in width, that would be 277.0 / 200.0 = 1.385.
public final static float CARD_WIDTH = 1f;
public final static float CARD_HEIGHT = CARD_WIDTH * 277f / 200f;
@Override
public void create() {
spriteBatch = new SpriteBatch();
atlas = new TextureAtlas(data + "/carddeck.atlas");
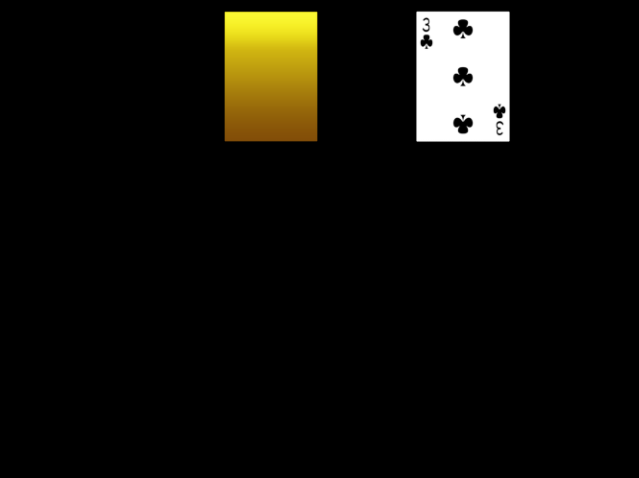
front = atlas.createSprite("back", 2);
front.setSize(CARD_WIDTH, CARD_HEIGHT);
front.setPosition(-1, 1);
back = atlas.createSprite("clubs", 3);
back.setSize(CARD_WIDTH, CARD_HEIGHT);
back.setPosition(1, 1);
}
We will be placing the camera at the origin (which is the default). This means that the location 0,0
is exactly in the middle. The location -1, 1 is one card width to the left of the middle and one card
width above the middle. Likewise, 1, 1 is one card width to the right of the middle and one card width
below the middle. Sprites are, by default, always positioned by the lower left corner.
Now we need to define the visible size of our world: how many cards are visible to the user. Of course we want to maintain aspect ratio. Let’s say, for now, that we want to show at least 5 cards in both width and height and extend one of the two to maintain the aspect ratio of the screen.
public final static float MINIMUM_VIEWPORT_SIZE = 5f;
We’ll see how to extend it in a moment. We could also use a Viewport for that, but for now, we’ll just use a camera.
	OrthographicCamera cam;

	@Override
	public void create() {
		...
		cam = new OrthographicCamera();
	}
Now to make the camera look at our defined world, we need to override the resize method:
	@Override
	public void resize(int width, int height) {
		if (width > height) {
			cam.viewportHeight = MINIMUM_VIEWPORT_SIZE;
			cam.viewportWidth = cam.viewportHeight * (float)width / (float)height;
		} else {
			cam.viewportWidth = MINIMUM_VIEWPORT_SIZE;
			cam.viewportHeight = cam.viewportWidth * (float)height / (float)width;
		}
		cam.update();
	}
Note that you could do this also in the create method, but then it wouldn’t be updated
when the screen size changes. And since the resize method is always called immediately after
the create method, there’s no reason not to use it for this.
The viewportWidth and viewportHeight properties of the Camera class define the portion
of the world, in world units, that the camera sees. Unfortunately the term “viewport” is often
used in two different ways: the portion of the world (in world units) the camera sees and
the portion of the screen (in pixels) is being rendered onto. These are two different things,
make sure to understand the difference.
The actual calculation of the viewportWidth and viewportHeight values should speak for
itself. So, time to use the camera in our projection:
	@Override
	public void render() {
		...
		spriteBatch.setProjectionMatrix(cam.combined);
		...
	}
That’s it, we tell the spritebatch to use the camera’s combined view-projection matrix.
Structure the code
Time to cleanup the code a bit. We need to identify our cards, keep track of which side is up, etc. For this it is good idea to add a Card class that does exactly that. But before we do that, first add two enums to specify the suit and pip of the card.
	public enum Suit {
		Clubs("clubs", 0), Diamonds("diamonds", 1), Hearts("hearts", 2), Spades("spades", 3);
		public final String name;
		public final int index;
		private Suit(String name, int index) {
			this.name = name;
			this.index = index;
		}
	}
	public enum Pip {
		Ace(1), Two(2), Three(3), Four(4), Five(5), Six(6), Seven(7), Eight(8), Nine(9), Ten(10), Jack(11), Queen(12), King(13);
		public final int value;
		public final int index;
		private Pip(int value) {
			this.value = value;
			this.index = value - 1;
		}
	}
I made sure that the name of the suit is the same as the name of the atlas region and the
value of the pip is the same as the indexer of the atlas region. So we could use these values
in the call to atlas.createSprite(suit.name, pip.value) to get the correct Sprite.
Let’s create a Card class. It should have a reference to its Suit and Pip so we can identify
it. It should keep track of whether it is turned front face or back face showing. It should
keep track of the Sprite for the front of the back. And it should be possible to position the
card.
	public static class Card {
		public final Suit suit;
		public final Pip pip;

		private final Sprite front;
		private final Sprite back;

		private boolean turned;

		public Card(Suit suit, Pip pip, Sprite back, Sprite front) {
			back.setSize(CARD_WIDTH, CARD_HEIGHT);
			front.setSize(CARD_WIDTH, CARD_HEIGHT);
			this.suit = suit;
			this.pip = pip;
			this.back = back;
			this.front = front;
		}

		public void setPosition(float x, float y) {
			front.setPosition(x - 0.5f * front.getWidth(), y - 0.5f * front.getHeight());
			back.setPosition(x - 0.5f * back.getWidth(), y - 0.5f * back.getHeight());
		}

		public void turn() {
			turned = !turned;
		}

		public void draw(Batch batch) {
			if (turned)
				back.draw(batch);
			else
				front.draw(batch);
		}
	}
For the sake of this tutorial I left out some optimisations and methods you could add.
The most noticeable aspect of this code is probably that I moved the position relative
to the center of the card. So, placing the card at 0,0 will place it exactly at the center
of the world (and screen). I like to use the center instead of the corner to position things,
because it makes the math easier. Later on we will see this in practice.
For each back side, we can have 4 suits and 13 pips, totalling to 52 cards, which is also called a deck. We are not actually going to implement any card game logic. Therefor, to keep things simple, the deck is the container (or provider if you like) of all our cards:
	public static class CardDeck {
		private final Card[][] cards;

		public CardDeck(TextureAtlas atlas, int backIndex) {
			cards = new Card[Suit.values().length][];
			for (Suit suit : Suit.values()) {
				cards[suit.index] = new Card[Pip.values().length];
				for (Pip pip : Pip.values()) {
					Sprite front = atlas.createSprite(suit.name, pip.value);
					Sprite back = atlas.createSprite("back", backIndex);
					cards[suit.index][pip.index] = new Card(suit, pip, back, front);
				}
			}
		}

		public Card getCard(Suit suit, Pip pip) {
			return cards[suit.index][pip.index];
		}
	}
The CardDeck class holds a two dimensional array of all possible cards we could have. It
creates these cards upfront, using the atlas provided. Using the index values of the Suit
and Pip enum we created, we can now easily get the reference to a specific card in the deck.
Not all cards are actually visible at all times. To keep track of which cards are visible and
thus need to be drawn, we can add them to an ObjectSet, which is practically an array which
guarantees that the same card can only be added once. So we can’t accidentally use the same
card twice.
public class CardGame implements ApplicationListener {
    ...
    CardDeck deck;
    ObjectSet<Card> cards;

	@Override
	public void create() {
		spriteBatch = new SpriteBatch();
		atlas = new TextureAtlas(data + "/carddeck.atlas");
		cards = new ObjectSet<Card>();

		deck = new CardDeck(atlas, 3);

		Card card1 = deck.getCard(Suit.Diamonds, Pip.Queen);
		card1.setPosition(-1, 0);
		cards.add(card1);

		Card card2 = deck.getCard(Suit.Hearts, Pip.Four);
		card2.setPosition(0, 0);
		cards.add(card2);

		Card card3 = deck.getCard(Suit.Spades, Pip.Ace);
		card3.setPosition(1, 0);
		card3.turn();
		cards.add(card3);

		cam = new OrthographicCamera();
	}
	...
	@Override
	public void render() {
		Gdx.gl.glClear(GL20.GL_COLOR_BUFFER_BIT | GL20.GL_DEPTH_BUFFER_BIT);
		spriteBatch.setProjectionMatrix(cam.combined);
		spriteBatch.begin();
		for (Card card : cards)
			card.draw(spriteBatch);
		spriteBatch.end();
	}
	...
}
We can now have a deck of cards (or more decks if you like) where we can get a card from specified by its suit and pip. We can position and turn that card. And by adding it to the cards set it will be drawn.
Well there you have it. The only thing that’s missing is some cardgame logic and we’re done. But we will not look into that. Instead let’s step into the next dimension!
Don’t be afraid, if you understood everything up until now, then the rest of this tutorial will be a piece of cake.
2.5D
Ever heard of 2.5D? It is a term
basically to describe mimicking 3D in a 2D projection. However, OpenGL is already 3D. And 2D
in OpenGL (and libGDX) is “just” 3D at z = 0. Usually it is easier to do 3D than it is to do 2.5D.
If you ever find yourself mimicking 3D (like skewing) then keep in mind that you are probably making
it yourself harder than it should be.
I should note that I am the main author of libGDX 3D api, so I am a bit biased. But let me show you what I mean.
In the code up until now we’ve use an orthographic projection. This means that things are always the same size, regardless the distance to camera. There is no real notion of depth. But even with that projection we can peek at 3D, by moving the camera around, only adding a few lines of code:
public class CardGame implements ApplicationListener {
	...
	CameraInputController camController;

	@Override
    public void create() {
    	...
		cam = new OrthographicCamera();
		cam.position.set(0, 0, 10);
		cam.lookAt(0, 0, 0);
		camController = new CameraInputController(cam);
		Gdx.input.setInputProcessor(camController);
    }

	@Override
	public void render() {
		camController.update();
		...
	}
}
Here we add the CameraInputController, which is a simple class that allows us to control the camera
using the mouse. For example dragging will cause the camera to move around the origin: 0, 0, 0.
By default the camera is located at 0, 0, 0, so that would cause it to rotate around itself, which
isn’t very practical in our use-case. Therefor we move the camera a bit away from the origin. Because
an orthographic projection has no notion of depth, we can freely move the camera on the z-axis without
changing the result. LibGDX uses the right hand projection, which means that a positive z-value for the camera position,
moves the camera to the back (the camera looks in the direction z=-1).
Probably worth noting that everything behind the camera is not visible. Although this might seem obvious think about what would happen if we would use banana units.
Perspective projection
If you look at the previous image then you’ll see: having no notion of depth doesn’t look very realistic.
The orthographic projection is typically used because it allows to position according to an easy to
specify 2D coordinate system. This 2D coordinate system is the XY plane at z=0. However, it is possible
to have the same benefit while using a perspective projection (a notion of depth). I’ll go a bit into the math, but don’t worry
if you find it hard to follow, you can take it for granted if you like:
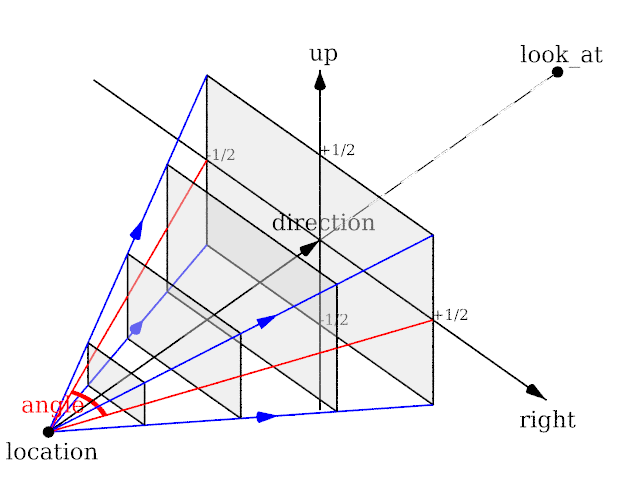
A perspective projection is defined as the angle of the triangle (frustum) the camera can see from its location. This angle is also known as the “field of view”. Actually, there are two angles, the horizontal and vertical angles. LibGDX let’s you specify the vertical angle along with the aspect ratio (width and height) and it will calculate the horizontal angle for you.
For our use-case we want to know the location of the camera at which the XY (z=0) plane is 5 cards in size,
so that it practically is the same as with the OrthographicCamera. Or in other words: where the height of the
triangle between the camera and half the XY (z=0) plane is 2.5 card widths. Trigonometry learns us that we
can easily calculate that location.
public class CardGame implements ApplicationListener {
	...
	PerspectiveCamera cam;
	...
	@Override
	public void create() {
		...
		cam = new PerspectiveCamera();
		...
	}

	@Override
	public void resize(int width, int height) {
		float halfHeight = MINIMUM_VIEWPORT_SIZE * 0.5f;
		if (height > width)
			halfHeight *= (float)height / (float)width;
		float halfFovRadians = MathUtils.degreesToRadians * cam.fieldOfView * 0.5f;
		float distance = halfHeight / (float)Math.tan(halfFovRadians);

		cam.viewportWidth = width;
		cam.viewportHeight = height;
		cam.position.set(0, 0, distance);
		cam.lookAt(0, 0, 0);
		cam.update();
	}
	...
}
Here we replaced the OrthographicCamera by the PerspectiveCamera. This camera is created with its default
values, meaning a vertical angle of 67 degrees. The horizontal angle depends on the viewportWidth and
viewportHeight values as we’ve seen earlier. We calculate the location at which to place the camera so that
the XY (z=0) plane is the same as when we used the OrthographicCamera. I’ll not go into the trigonometry behind it (tan(angle) = opposite / adjacent).
If you run this, then you’ll see that the 2D placement is exactly the same, but now we have perspective when moving the camera.
 .
.
Convert 2D to 3D
We now have a perspective projection for our standard 2D world and the only thing we changed is the camera. Wouldn’t it be cool if we would be able to rotate and perhaps position the individual cards in 3D? Sprite is limited to 2D coordinates, it doesn’t have a z coordinate. So, for that, we’ll need to convert the sprite to something that does have a z coordinate.
This section contains some theory about the inner workings of libGDX. Don’t worry if you find it hard to grasp, that’s understandable. You don’t need to fully understand this part to use it. But I think that it is good that you at least have had a peek behind the scenes.
Note: in this step I’m showing a quick solution which creates a native resource but doesn’t dispose it. Don’t use this in production code. In the next step I’ll show you how to properly dispose resources.
First have a quick look at our new Card class, we will discuss it below:
	public static class Card extends Renderable {
		public final Suit suit;
		public final Pip pip;

		public Card(Suit suit, Pip pip, Sprite back, Sprite front) {
			assert(front.getTexture() == back.getTexture());
			this.suit = suit;
			this.pip = pip;

			material = new Material(
					TextureAttribute.createDiffuse(front.getTexture()),
					new BlendingAttribute(false, 1f),
					FloatAttribute.createAlphaTest(0.5f)
				);

			front.setSize(CARD_WIDTH, CARD_HEIGHT);
			back.setSize(CARD_WIDTH, CARD_HEIGHT);

			front.setPosition(-front.getWidth() * 0.5f, -front.getHeight() * 0.5f);
			back.setPosition(-back.getWidth() * 0.5f, -back.getHeight() * 0.5f);

			float[] vertices = convert(front.getVertices(), back.getVertices());
			short[] indices = new short[] {0, 1, 2, 2, 3, 0, 4, 5, 6, 6, 7, 4 };

			// FIXME: this Mesh needs to be disposed
			meshPart.mesh = new Mesh(true, 8, 12, VertexAttribute.Position(), VertexAttribute.Normal(), VertexAttribute.TexCoords(0));
			meshPart.mesh.setVertices(vertices);
			meshPart.mesh.setIndices(indices);
			meshPart.offset = 0;
			meshPart.size = meshPart.mesh.getNumIndices();
			meshPart.primitiveType = GL20.GL_TRIANGLES;
			meshPart.update();
		}

		private static float[] convert(float[] front, float[] back) {
			return new float[] {
				front[Batch.X2], front[Batch.Y2], 0, 0, 0, 1, front[Batch.U2], front[Batch.V2],
				front[Batch.X1], front[Batch.Y1], 0, 0, 0, 1, front[Batch.U1], front[Batch.V1],
				front[Batch.X4], front[Batch.Y4], 0, 0, 0, 1, front[Batch.U4], front[Batch.V4],
				front[Batch.X3], front[Batch.Y3], 0, 0, 0, 1, front[Batch.U3], front[Batch.V3],

				back[Batch.X1], back[Batch.Y1], 0, 0, 0, -1, back[Batch.U1], back[Batch.V1],
				back[Batch.X2], back[Batch.Y2], 0, 0, 0, -1, back[Batch.U2], back[Batch.V2],
				back[Batch.X3], back[Batch.Y3], 0, 0, 0, -1, back[Batch.U3], back[Batch.V3],
				back[Batch.X4], back[Batch.Y4], 0, 0, 0, -1, back[Batch.U4], back[Batch.V4]
			};
		}
	}
Card now extends Renderable, which is basically “a thing that can be rendered”. To keep things simple,
I’ll not go into much detail about that now. For us, practically, a Renderable has some properties we
can set so it can be drawn onto the screen. Most notable: the shape (Mesh) and image (Material).
The latter is a single call which tells which texture we want to use. Because the texture (not the region)
is the same for both the front and the back side, we can use the same material for both sides. The
BlendingAttribute is added because the images contain transparency. The “alpha test” is used to inform
libGDX that it can ignore pixels with less than 50% transparency.
	material = new Material(
			TextureAttribute.createDiffuse(front.getTexture()),
			new BlendingAttribute(false, 1f),
			FloatAttribute.createAlphaTest(0.5f)
		);
For the shape (Mesh), we need to convert the Sprite to have a z-coordinate. For this we can take
the vertices of the Sprite and add a z coordinate it. I’ll not discuss
vertices in depth.
But simply said, it is an array that contains the information about each corner of the card, like the
position of the corner, the coordinates on the texture of the region and the color of the sprite.
The position of the sprite only contains a X and Y coordinate, we will add a Z component and set it
to zero. We wont use the color value of the sprite, so we can leave that out. However, for lighting effects
later on we will be adding a “normal”, which is perpendicular to the face of the card. For the front side
this will be the +Z direction and for the back side this will be the -Z direction.
Because I like to position the cards from the center, first position the sprites so that the center is exactly
at x:0, y:0 and then convert the vertices:
	front.setPosition(-front.getWidth() * 0.5f, -front.getHeight() * 0.5f);
	back.setPosition(-back.getWidth() * 0.5f, -back.getHeight() * 0.5f);

	float[] vertices = convert(front.getVertices(), back.getVertices());
The convert method is a little helper method that takes the Sprite vertices and adds the Z coordinate
and “normal” values.
		private static float[] convert(float[] front, float[] back) {
			return new float[] {
				front[Batch.X2], front[Batch.Y2], 0, 0, 0, 1, front[Batch.U2], front[Batch.V2],
				front[Batch.X1], front[Batch.Y1], 0, 0, 0, 1, front[Batch.U1], front[Batch.V1],
				front[Batch.X4], front[Batch.Y4], 0, 0, 0, 1, front[Batch.U4], front[Batch.V4],
				front[Batch.X3], front[Batch.Y3], 0, 0, 0, 1, front[Batch.U3], front[Batch.V3],

				back[Batch.X1], back[Batch.Y1], 0, 0, 0, -1, back[Batch.U1], back[Batch.V1],
				back[Batch.X2], back[Batch.Y2], 0, 0, 0, -1, back[Batch.U2], back[Batch.V2],
				back[Batch.X3], back[Batch.Y3], 0, 0, 0, -1, back[Batch.U3], back[Batch.V3],
				back[Batch.X4], back[Batch.Y4], 0, 0, 0, -1, back[Batch.U4], back[Batch.V4]
			};
		}
You might notice that I use the order of sprite vertices: 2, 1, 4, 3 for the front and 1, 2, 3, 4 for the back.
This is because the order of the vertices can be used for culling (not rendering what is not visible to
the camera) which is enabled for 3D by default. So when the front side is visible, the back side is not
rendered and vice versa. Unfortunately there’s an issue with the Sprite vertices, which requires the vertices to be swapped to
be correct. This is probably going to be fixed in the future, in which case the order would be 1, 2, 3, 4
for the front and 2, 1, 4, 3 for the back side.
We also need to define the indices, which is an array to specify which corners for each triangle the GPU needs to render. We have two sides, eight corners. Two triangles per side, so four triangles. Each triangle is three corners, so 12 indices.
short[] indices = new short[] {0, 1, 2, 2, 3, 0, 4, 5, 6, 6, 7, 4 };
With these arrays at hand we can create the Mesh, which is what is sent to the GPU to render.
meshPart.mesh = new Mesh(true, 8, 12, VertexAttribute.Position(), VertexAttribute.Normal(), VertexAttribute.TexCoords(0));
meshPart.mesh.setVertices(vertices);
meshPart.mesh.setIndices(indices);
meshPart.offset = 0;
meshPart.size = meshPart.mesh.getNumIndices();
meshPart.primitiveType = GL20.GL_TRIANGLES;
meshPart.update();
We have 8 vertices (corners) and 12 indices. Each vertex has a position, normal and texture coordinates. We provide this to the Mesh constructor so it knows what to expect. Then we give it the vertices and indices we just created. Finally we add some additional information to specify that we want to render the entire shape using triangles.
We removed the setPosition method, because Renderable has a worldTransform member which can be used to
achieve the same (and more). To render these cards, we can’t use SpriteBatch anymore, instead we need to
use ModelBatch. So let’s replace SpriteBatch with ModelBatch.
	ModelBatch modelBatch;

	@Override
	public void create() {
		modelBatch = new ModelBatch();

		atlas = new TextureAtlas(data + "/carddeck.atlas");
		cards = new ObjectSet<Card>();

		deck = new CardDeck(atlas, 3);

		Card card1 = deck.getCard(Suit.Diamonds, Pip.Queen);
		card1.worldTransform.translate(-1, 0, 0);
		cards.add(card1);

		Card card2 = deck.getCard(Suit.Hearts, Pip.Four);
		card2.worldTransform.translate(0, 0, 0);
		cards.add(card2);

		Card card3 = deck.getCard(Suit.Spades, Pip.Ace);
		card3.worldTransform.translate(1, 0, 0);
		cards.add(card3);

		cam = new PerspectiveCamera();
		cam.position.set(0, 0, 10);
		cam.lookAt(0, 0, 0);
		camController = new CameraInputController(cam);
		Gdx.input.setInputProcessor(camController);
	}
We’ve used the method Card.worldTransform.translate to position (move) the cards.
Time to render the cards and while we’re at it, let’s rotate the first card around it’s y axis, which can be
done using that same worldTransform member:
	@Override
	public void render() {
		final float delta = Math.min(1/30f, Gdx.graphics.getDeltaTime());

		Gdx.gl.glClear(GL20.GL_COLOR_BUFFER_BIT | GL20.GL_DEPTH_BUFFER_BIT);

		camController.update();

		cards.first().worldTransform.rotate(Vector3.Y, 90 * delta);

		modelBatch.begin(cam);
		for (Card card : cards)
			modelBatch.render(card);
		modelBatch.end();
	}
Here we rotate the first card around the y axis depending on the time since the last time this was done.
Using the ModelBatch is practically the same as SpriteBatch in this case.
ModelBatch needs to be disposed, so make sure to dispose it properly:
	@Override
	public void dispose() {
		modelBatch.dispose();
		atlas.dispose();
	}
![]() .
.
That was a lot of theory, but don’t worry if you find it too much to follow at once. In practice there’s
not much changed. We now use ModelBatch and Renderable instead of SpriteBatch and Sprite, and for
that we had to convert Sprite to Renderable using a helper method. Note that you can mix the two,
you could still use SpriteBatch while also using ModelBatch, as long as they are not nested.
Reduce the number of render calls
As said, the previous code is for testing only, the Mesh is never disposed. Apart from that there is
another issue with it: every card involves a render call. This is important because it requires the CPU
and GPU to talk to each other, which ultimately likely requires their threads to synchronize. So if there
are 52 cards visible on the screen, then the CPU and GPU need to synchronize 52 times, every frame.
To solve that, we could use
ModelCache which, just like
SpriteBatch, combines all cards into one render call. However, it is
possible to optimize even more, by not creating a Mesh for each card. This is possible because each
card uses the same texture and thus the same material. Just like we can combine the front and back side
of each card because of that, we can also combine all cards because of that. That would also solve the
dispose issue we had to fix.
This is practically just moving code around, although I will use a special helper class for creating the
mesh. But before we look into that, first make the Card class not extend Renderable anymore, because we
only need one Renderable for all cards now.
	public static class Card {
		public final Suit suit;
		public final Pip pip;

		public final float[] vertices;
		public final short[] indices;

		public final Matrix4 transform = new Matrix4();

		public Card(Suit suit, Pip pip, Sprite back, Sprite front) {
			assert(front.getTexture() == back.getTexture());
			this.suit = suit;
			this.pip = pip;
			front.setSize(CARD_WIDTH, CARD_HEIGHT);
			back.setSize(CARD_WIDTH, CARD_HEIGHT);
			front.setPosition(-front.getWidth() * 0.5f, -front.getHeight() * 0.5f);
			back.setPosition(-back.getWidth() * 0.5f, -back.getHeight() * 0.5f);

			vertices = convert(front.getVertices(), back.getVertices());
			indices = new short[] {0, 1, 2, 2, 3, 0, 4, 5, 6, 6, 7, 4 };
		}

		private static float[] convert(float[] front, float[] back) {
			return new float[] {
				front[Batch.X2], front[Batch.Y2], 0, 0, 0, 1, front[Batch.U2], front[Batch.V2],
				front[Batch.X1], front[Batch.Y1], 0, 0, 0, 1, front[Batch.U1], front[Batch.V1],
				front[Batch.X4], front[Batch.Y4], 0, 0, 0, 1, front[Batch.U4], front[Batch.V4],
				front[Batch.X3], front[Batch.Y3], 0, 0, 0, 1, front[Batch.U3], front[Batch.V3],

				back[Batch.X1], back[Batch.Y1], 0, 0, 0, -1, back[Batch.U1], back[Batch.V1],
				back[Batch.X2], back[Batch.Y2], 0, 0, 0, -1, back[Batch.U2], back[Batch.V2],
				back[Batch.X3], back[Batch.Y3], 0, 0, 0, -1, back[Batch.U3], back[Batch.V3],
				back[Batch.X4], back[Batch.Y4], 0, 0, 0, -1, back[Batch.U4], back[Batch.V4]
			};
		}
	}
That should be pretty straight forward: no Rendarable, Mesh and Material anymore. Instead the card holds
now an float[] array of its vertices and short[] array of its indices. I also added a transform member,
because that can easily be used to position the card within 3D space.
For the next part we need to combine all cards in the ObjectSet into a single Renderable. For this tutorial
I am going to extend ObjectSet and add the functionality to it, this allows us to use batch.render(cards)
later on. Unfortunately Java doesn’t allow us to extend Renderable as well. So instead we’ll be implementing
RenderableProvider, an interface that can provide one or more renderables and can be used in the same way with
ModelBatch.
	public static class CardBatch extends ObjectSet<Card> implements RenderableProvider {
		Renderable renderable;

		public CardBatch() {
			renderable = new Renderable();
		}

		@Override
		public void getRenderables(Array<Renderable> renderables, Pool<Renderable> pool) {
			renderables.add(renderable);
		}
	}
As you can see I named the class CardBatch and simply let it pass one Renderable. Of course this will not
render anything, we need at least a Mesh and Material. And the Mesh, as we know, has to be disposed.
	public static class CardBatch extends ObjectSet<Card> implements RenderableProvider, Disposable {
		Renderable renderable;
		Mesh mesh;

		public CardBatch(Material material) {
			final int maxNumberOfCards = 52;
			final int maxNumberOfVertices = maxNumberOfCards * 8;
			final int maxNumberOfIndices = maxNumberOfCards * 12;
			mesh = new Mesh(false, maxNumberOfVertices, maxNumberOfIndices,
					VertexAttribute.Position(), VertexAttribute.Normal(), VertexAttribute.TexCoords(0));

			renderable = new Renderable();
			renderable.material = material;
		}

		@Override
		public void getRenderables(Array<Renderable> renderables, Pool<Renderable> pool) {
			renderables.add(renderable);
		}

		@Override
		public void dispose() {
			mesh.dispose();
		}
	}
I made the Material a constructor argument and we simply assign it to the Renderable. The Mesh creation code
is the same as we did before, except that it now needs to be big enough to hold at most the vertices and indices of
all 52 cards. Finally we properly dispose the Mesh in the dispose method and for that we implemented Disposable
as well.
Now actually combine cards in the mesh we can use a little helper class of libGDX. Note that you need at least version 1.7.2 of libGDX for this (or latest snapshot).
	public static class CardBatch extends ObjectSet<Card> implements RenderableProvider, Disposable {
		Renderable renderable;
		Mesh mesh;
		MeshBuilder meshBuilder;

		public CardBatch(Material material) {
			final int maxNumberOfCards = 52;
			final int maxNumberOfVertices = maxNumberOfCards * 8;
			final int maxNumberOfIndices = maxNumberOfCards * 12;
			mesh = new Mesh(false, maxNumberOfVertices, maxNumberOfIndices,
					VertexAttribute.Position(), VertexAttribute.Normal(), VertexAttribute.TexCoords(0));
			meshBuilder = new MeshBuilder();

			renderable = new Renderable();
			renderable.material = material;
		}

		@Override
		public void getRenderables(Array<Renderable> renderables, Pool<Renderable> pool) {
			meshBuilder.begin(mesh.getVertexAttributes());
			meshBuilder.part("cards", GL20.GL_TRIANGLES, renderable.meshPart);
			for (Card card : this) {
				meshBuilder.setVertexTransform(card.transform);
				meshBuilder.addMesh(card.vertices, card.indices);
			}
			meshBuilder.end(mesh);

			renderables.add(renderable);
		}

		@Override
		public void dispose() {
			mesh.dispose();
		}
	}
Meet MeshBuilder.
This class can be used to easily combine the cards in the get method. This method is called every frame, so it
is important that is quick and doesn’t create garbage. Let’s have a look at the actual code:
meshBuilder.begin(mesh.getVertexAttributes());
meshBuilder.part("cards", GL20.GL_TRIANGLES, renderable.meshPart);
for (Card card : this) {
	meshBuilder.setVertexTransform(card.transform);
	meshBuilder.addMesh(card.vertices, card.indices);
}
meshBuilder.end(mesh);
begin tells the MeshBuilder that we want to start building a new mesh. The part method is used to instruct
MeshBuilder that we want create a new part (a Mesh can consist of more parts, but we wont look into that now).
In this method we give it the renderable.meshPart object. This will cause MeshBuilder to set that object to
the correct values, just like we did manually in the previous part.
Next, for each card, we provide MeshBuilder the transform, vertices and indices of the card. The
setVertexTransform makes MeshBuilder transform (move, rotate, etc.) everything that is added after that. In
our these are the vertices and indices of the card.
And finally we call end which tells MeshBuilder that we are done and that it finish building. Note that we
provide our mesh in this method. This causes MeshBuilder to reuse that mesh instead of creating a new one.
That’s it, now we only have to replace the ObjectSet with our CardBatch class and, of course, dispose it.
public class CardGame implements ApplicationListener {
	...
	CardBatch cards;

	@Override
	public void create() {
		modelBatch = new ModelBatch();
		atlas = new TextureAtlas(data + "/carddeck.atlas");
		Material material = new Material(
				TextureAttribute.createDiffuse(atlas.getTextures().first()),
				new BlendingAttribute(false, 1f),
				FloatAttribute.createAlphaTest(0.5f));
		cards = new CardBatch(material);
		...
	}
	...
	@Override
	public void render() {
		...
		modelBatch.begin(cam);
		modelBatch.render(cards);
		modelBatch.end();
	}
	...
	@Override
	public void dispose() {
		modelBatch.dispose();
		atlas.dispose();
		cards.dispose();
	}
}
If run this you’ll see it is exactly the same as above, except that it now only requires a single draw call, which is a lot better for performance. This is also how voxels basically work.
Add a table
Time to have some fun! Let’s add a table, for which I will use a simple box model. This part is very simple, I am using the code of this tutorial. That tutorial also shows how to add an Environment for lighting, which I will add as well.
public class CardGame implements ApplicationListener {
	...
	Model tableTopModel;
	ModelInstance tableTop;
	Environment environment;

	@Override
	public void create() {
		...
		ModelBuilder builder = new ModelBuilder();
		builder.begin();
		builder.node().id = "top";
		builder.part("top", GL20.GL_TRIANGLES, Usage.Position | Usage.Normal,
				new Material(ColorAttribute.createDiffuse(new Color(0x63750A))))
			.box(0f, 0f, -0.5f, 20f, 20f, 1f);
		tableTopModel = builder.end();
		tableTop = new ModelInstance(tableTopModel);

		environment = new Environment();
		environment.set(new ColorAttribute(ColorAttribute.AmbientLight, 0.4f, 0.4f, 0.4f, 1.f));
		environment.add(new DirectionalLight().set(0.8f, 0.8f, 0.8f, -.4f, -.4f, -.4f));
	}

	@Override
	public void render() {
		...
		modelBatch.begin(cam);
		modelBatch.render(tableTop, environment);
		modelBatch.render(cards, environment);
		modelBatch.end();
	}

	@Override
	public void dispose() {
		modelBatch.dispose();
		atlas.dispose();
		cards.dispose();
		tableTopModel.dispose();
	}
}
This code is practically copied from that tutorial.
It creates a Model using ModelBuilder. Then it creates a ModelInstance from the Model. It also creates
an Environment and adds a AmbientLight and DirectionalLight to it. The environment is used as second
argument in the modelBatch.render call. Finally the Model needs to be disposed because it contains native
resources.
You might note that I did use a slightly different way to create the box model though. Instead of the createBox
convenience method, I’ve use the part and box methods. This is practically the same, but allows for some more
flexibility.
The “table top” is a box with a width of 20 (card widths), a height of 20 (card widths) and a depth of 1 (card width).
It is centered at x:0, y:0, z:-0.5, meaning that it practically is 20 by 20 size exactly on the XY plane (z=0).
Let’s run it and see how it looks:
 .
.
Keeping the cards on the table
Well, that doesn’t look good, we have two problems. First of all the card is rotating around the Y axis on z=0, so
half the card is always stuck in the table. To solve that we would need to lift the card a bit from the table when
rotating.
The second problem is called z-fighting. Both
the table and the cards are located at z=0, they are practically at the same distance from the camera. Depending
on the angle of the camera and the distance (cam.far / cam.near) the camera can see, this causes
floating point precision errors
making parts of the table visible through the card. We can solve this by slightly moving the cards towards the
camera.
The second problem, moving the cards a bit towards the camera, is easy. But for the first problem we’d need to keep
track of the rotation and set the z-coordinate accordingly. Preferable we don’t want to care about that in the game
logic, because that’s only 2D on the surface of the table. Therefor we will keep track of the position and the
angle with the card and wont be using the transform matrix directly anymore
(here you can read
more info about that).
	public static class Card {
		...
		public final Matrix4 transform = new Matrix4();
		public final Vector3 position = new Vector3();
		public float angle;
		...
		public void update() {
			float z = position.z + 0.5f * Math.abs(MathUtils.sinDeg(angle));
			transform.setToRotation(Vector3.Y, angle);
			transform.trn(position.x, position.y, z);
		}
	}
This allows us to position the card on a plane using the position vector, along with specifying an angle of
the rotation on the Y-axis and calling the update method will set the transform matrix accordingly. For the
card lifting part I used a sine, which gives a nice natural look of lifting the card from the table while turning
it.
Note you could hide the transform matrix to prevent modifying it directly as well as a setter for the position
and angle which would automatically call update. I’ll leave that up to you, if you like that to add.
Now let’s use these two new members. And don’t forget to fix the second problem as well by slightly moving the cards away from the table.
	@Override
	public void create() {
		...
		Card card1 = deck.getCard(Suit.Diamonds, Pip.Queen);
		card1.position.set(-1, 0, 0.01f);
		card1.update();
		cards.add(card1);

		Card card2 = deck.getCard(Suit.Hearts, Pip.Seven);
		card2.position.set(0, 0, 0.01f);
		card2.update();
		cards.add(card2);

		Card card3 = deck.getCard(Suit.Spades, Pip.Ace);
		card3.position.set(1, 0, 0.01f);
		card3.update();
		cards.add(card3);
		...
	}
	...
	@Override
	public void render() {
		...
		Card card = cards.first();
		card.angle = (card.angle + 90 * delta) % 360;
		card.update();
		...
	}
This should be pretty straight forward. I moved the cards 0.01 (1% of the card width) in front of the table.
Of course, as an alternative, you could move the table that amount away from the camera to keep the cards on
z=0 if you prefer that.
 .
.
Well that looks a lot better. What’s also nice is that we now can tween the position and angle values, for
example to implement an animation. I’ll leave it up to you as an exercise to add an animation like in the
following image. Although, admittedly, I added some shadows for the extra visual effect.
 .
.
If you want to have a look at it, you can find the source code behind this image also on github.
This webpage is open source and can be found at: https://github.com/xoppa/xoppa.github.io.
The accompanying sources can be found at: https://github.com/xoppa/blog.
Let me know what you think about this post in the comments below. If you need help then please use the forum instead. If you found an issue with this post then please report an issue or send a pull request.